What Are the Essential Camping Gear Items for Beginners?

Discover the must-have camping equipment for beginners - from reliable tents to cooking essentials - ensuring comfortable, safe, and enjoyable outdoor experiences for first-time campers.

Why Proper Gear Matters
  • The right camping equipment ensures protection from environmental elements and unpredictable weather conditions
  • Quality gear enhances comfort, transforming potentially challenging experiences into enjoyable adventures
  • Properly selected items build confidence for beginners, allowing focus on enjoyment rather than equipment concerns
  • Smart initial investments create a foundation for future experiences while minimizing unnecessary purchases
Essential camping gear items for beginners

Shelter Systems: Your Home Away From Home

Selecting Your First Camping Tent

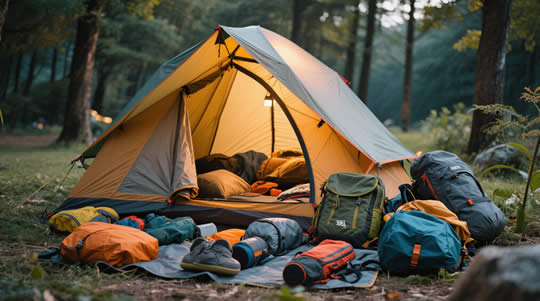
Your tent serves as your primary protection against weather and creates a sense of security in the outdoors. For beginners, choosing the right shelter can significantly impact your overall camping experience:

Tent Capacity & Size

When selecting tent capacity, the general rule is to choose a tent rated for at least one person more than your group size. A "2-person" tent typically accommodates two adults with minimal extra space for gear. For comfort, a family of four should consider a 5-6 person tent, allowing room for movement and equipment storage. Remember that manufacturer capacity ratings represent tight configurations - upsizing provides enhanced comfort worth the slight weight increase for car camping situations.

Weather Protection Features

For beginners, a quality 3-season tent (designed for spring, summer, and fall conditions) offers the best versatility. Critical weather protection features include a full-coverage rainfly that extends to the ground, sealed seams to prevent water intrusion, and adequate ventilation to manage condensation. Look for a bathtub-style floor (waterproof material that extends several inches up the tent walls) and a sturdy pole structure that can withstand moderate wind. Guy-out points along the tent body allow for improved stability in adverse conditions.

Setup Considerations

Beginning campers should prioritize user-friendly designs with intuitive setup processes. Freestanding tents offer the easiest setup, requiring minimal staking while allowing repositioning after initial assembly. Look for color-coded poles and attachment points that simplify the assembly process. Before your first camping trip, practice setting up your tent at home to familiarize yourself with the procedure - this builds confidence and identifies any potential issues before arriving at your campsite. Quality tents typically include detailed setup instructions sewn into their storage bags for reference.

Additional Shelter Considerations

Beyond the tent itself, consider complementary shelter items that enhance comfort. A ground cloth or footprint protects your tent floor from moisture and abrasion, extending its lifespan. Separately, a tarp or shade canopy provides additional protected outdoor living space for cooking or gathering during light rain or intense sun. When camping in areas with unpredictable weather, extra guy lines and stakes allow for more secure tent anchoring. Many experienced campers also pack a small repair kit with tape and extra cord for emergency shelter repairs.

Beginner's Tent Recommendation

For first-time campers, a 3-season dome tent from a reputable outdoor brand represents the best balance of affordability, durability, and ease of use. Look for models featuring aluminum poles (more durable than fiberglass), a full-coverage rainfly, mesh panels for ventilation, and a vestibule area for storing boots and wet gear outside the main tent body. While premium brands offer excellent quality, there are several mid-range options that provide reliability without excessive cost. Consider visiting a specialty outdoor retailer where you can see erected floor models to better understand different tent designs before purchasing.

Sleep Systems: Rest for Adventure

Sleeping Bags

Key Sleeping Bag Features:
  • Temperature Rating: Choose a bag rated 10°F lower than the coldest temperature you expect to encounter
  • Insulation Type: Synthetic fill offers reliable performance when damp; down provides superior warmth-to-weight but requires careful moisture protection
  • Shape Options: Rectangular bags maximize space and comfort; mummy bags provide better thermal efficiency
  • Hood Design: An insulated hood helps retain significant body heat during cooler nights
  • Zipper Quality: Look for anti-snag zippers with draft tubes that prevent cold air infiltration
Understanding Temperature Ratings

Sleeping bag temperature ratings indicate the lowest temperature at which an average sleeper remains comfortable when using an insulating sleeping pad. The standardized EN/ISO rating system includes a "comfort rating" (temperature at which a cold sleeper stays comfortable) and a "lower limit" (temperature at which a warm sleeper stays comfortable). For beginners, the comfort rating provides a better guideline for bag selection. Remember that personal factors like metabolism, clothing, and sleeping pad insulation significantly influence your actual sleeping temperature.

Sleeping Pads

Choosing the Right Sleeping Pad:
  • Air Pads: Offer excellent comfort and packability but require inflation and risk puncture
  • Self-Inflating Pads: Provide good balance of comfort, convenience, and durability
  • Closed-Cell Foam: Deliver unmatched reliability and durability with modest comfort
  • R-Value: This insulation rating indicates how well the pad prevents heat loss to the ground (higher values = better insulation)
  • Thickness: Thicker pads (2-3 inches) provide better comfort for side sleepers and on rough ground
R-Value Guidelines

For summer camping, an R-value of 1-2 typically suffices. For spring and fall conditions, look for R-values between 2-4. Winter camping requires R-values of 4+, with extreme conditions needing R-values above 5. Many campers combine a foam pad (for reliability and added insulation) with an air pad (for comfort) during cooler seasons. This combination provides both security against punctures and enhanced insulation at minimal additional weight.

Pillows & Sleep Accessories

Comfort Enhancements:
  • Camp Pillows: Dedicated inflatable or compressible pillows provide significant comfort improvements
  • Sleeping Bag Liners: Add 5-15°F of warmth while keeping your sleeping bag cleaner
  • Eye Masks: Block early morning light that can disrupt quality sleep
  • Earplugs: Minimize disruptions from campground noise or wildlife sounds
  • Stuff Sack Pillow: A stuffable sack filled with soft clothing creates an improvised pillow
Sleep Quality Matters

Quality sleep significantly impacts your camping experience. While more minimalist approaches work for experienced campers, beginners should prioritize sleep comfort. The marginal weight and space of items like proper pillows and sleeping bag liners pays dividends in energy and mood during your trip. Consider your normal sleep preferences at home and try to accommodate similar support for your neck and sleeping position when camping. Many negative first-time camping experiences stem from poor sleep that could have been improved with modest equipment additions.

Managing Sleep Temperature

Temperature Regulation Tips:
  • Base Layers: Clean, dry sleep-specific clothing regulates temperature better than daytime clothing
  • Hot Water Bottle: A sealed water bottle filled with hot water adds warmth on cold nights
  • Venting Techniques: Partially unzipping bags and layering allows flexible temperature adjustment
  • Hat Use: Wearing a beanie conserves significant heat in cool conditions
  • Site Selection: Choose level ground away from low areas where cold air pools overnight
Precautions for Comfort

Arrive at your campsite with enough daylight to properly set up your sleep system. Ensure your tent location provides good drainage in case of rain, and clear the ground of sharp objects that might puncture air pads. Before sleeping, change into clean, dry clothing reserved specifically for sleeping - the moisture in clothes worn during the day can create significant nighttime cooling. Have extra layers accessible without leaving your sleeping bag, allowing temperature adjustments without fully disrupting your comfort.

Camp Kitchen: Outdoors Culinary Essentials

Cooking Systems

Stove Options for Beginners:
  • Propane Camp Stoves: Two-burner models offer excellent performance for car camping with groups
  • Canister Stoves: Compact single-burner options using isobutane/propane canisters provide simplicity and reliability
  • Liquid Fuel Options: Greater cold-weather performance but require more maintenance and setup
  • All-in-One Systems: Integrated pot/stove combinations maximize efficiency for simple cooking
  • Fire Grates: Allow cooking over campfires where permitted and appropriate
Beginner Recommendations

For first-time car campers, a two-burner propane stove represents the most user-friendly cooking solution. These stoves operate similarly to home ranges, use widely available fuel, and provide sufficient cooking capacity for group meals. If prioritizing simplicity and minimizing gear, a quality canister stove with a separate pot offers excellent versatility at minimal weight and complexity. Always verify fuel availability before your trip, and carry slightly more fuel than your estimated needs to accommodate inefficiencies from wind or unexpected cooking requirements.

Cookware & Kitchen Tools

Essential Camp Kitchen Equipment:
  • Cooking Pots/Pans: Nesting pot sets with secure handles maximize space efficiency
  • Utensil Kit: Durable serving spoons, spatulas, and knives for food preparation
  • Plates/Bowls: Durable plastic or metal options resist breaking in camp environments
  • Mugs/Cups: Insulated designs maintain beverage temperature longer
  • Water Storage: Collapsible containers provide flexible water management
  • Cutting Board: Compact yet adequate surface for food preparation
Versatility & Simplicity

Prioritize multi-function items that minimize your overall kit. A large pot with lid can serve for boiling water, cooking pasta, and even baking simple items when employed creatively. Many experienced campers find that a medium pot, non-stick frying pan, and collapsible silicone kettle create a highly versatile cooking system. Camping-specific cookware generally offers better durability and packability than repurposed home kitchen items, with features like folding handles and nesting designs that optimize limited camp storage space.

Water Systems

Hydration & Water Management:
  • Water Containers: Large (5+ gallon) containers for car camping base camps
  • Personal Water Bottles: Durable 1-liter bottles for individual hydration
  • Water Filtration: Pump, gravity, or squeeze filters make natural water sources potable
  • Chemical Treatment: Tablets or drops provide backup purification methods
  • Collapsible Carriers: Space-efficient options for transporting water from distant sources
Water Planning

Research water availability at your destination before departing. For frontcountry campgrounds with potable water, focus on adequate storage capacity - plan for 1-2 gallons per person per day, accounting for drinking, cooking, and basic hygiene. For remote camping where natural water sources require treatment, a reliable filtration system paired with chemical treatment as backup provides essential redundancy. Regardless of source, always carry at least one day's drinking water in personal bottles that remain accessible during activities and travel.

Food Storage & Coolers

Keeping Food Fresh & Secure:
  • Hard Coolers: Durable options with 3-7 day ice retention for extended trips
  • Soft Coolers: Lightweight alternatives for day trips and shorter excursions
  • Dry Food Storage: Sealed containers protect non-refrigerated items from moisture and pests
  • Animal-Resistant Storage: Bear canisters or bags prevent wildlife encounters
  • Organization Systems: Bins and stackable containers maximize limited camp space
Cooler Performance Tips

Pre-chill your cooler before packing by filling it with ice the night before your trip. Use block ice rather than cubes when possible, as it melts more slowly. Pack items in reverse order of use, with items needed last placed at the bottom. Keep your cooler in shade whenever possible and minimize opening frequency. For extended trips, separate raw meats from other foods using sealed containers, and monitor internal temperatures with a small thermometer to ensure food safety. Always follow local regulations regarding food storage to prevent wildlife encounters and habitat disruption.

Camp Essentials: Comfort & Convenience

Lighting

Illuminating Your Campsite:
  • Headlamps: Hands-free lighting essential for individual tasks and navigation
  • Lanterns: Area lighting for cooking, socializing, and general camp illumination
  • String Lights: Ambient lighting that creates pleasant atmosphere while providing functional light
  • Flashlights: Focused beam lighting for specific tasks and emergency backup
  • Battery Considerations: Rechargeable vs. disposable options for different trip requirements
Lighting Strategy

A well-planned camp lighting system combines different light sources for layered functionality. Each person should have their own headlamp (with fresh batteries) for personal tasks and nighttime bathroom trips. A quality lantern provides general illumination for the main camp area, while string lights can define boundaries and create ambiance. Always pack spare batteries appropriate for your devices, and consider backup lighting options. Modern LED technology has dramatically improved lighting efficiency, allowing extended operation from compact battery sources.

Camp Furniture

Comfort Beyond the Ground:
  • Camp Chairs: Portable seating ranges from basic folding chairs to deluxe recliners
  • Tables: Folding tables provide cooking, dining, and activity surfaces
  • Hammocks: Offer relaxation options that double as alternative sleeping arrangements
  • Cots: Elevate sleeping position for easier entry/exit and improved comfort
  • Storage Solutions: Collapsible organizers help maintain camp order and accessibility
Car Camping Comfort

While minimalist approaches work for backpacking, car camping allows significant comfort enhancements through additional furniture. Quality camp chairs with proper back support make extended sitting considerably more comfortable than ground sitting or makeshift alternatives. A stable table creates proper food preparation surfaces and defines dining areas. When selecting camp furniture, consider setup complexity, packed size in your vehicle, and durability appropriate for your expected usage frequency. Most beginners find that chairs and a basic table provide the best initial comfort-to-space ratio.

Tools & Repair Items

Practical Problem Solvers:
  • Multi-tool: Combines pliers, knife, screwdrivers and other functions in a compact package
  • Duct Tape: Universal repair material for temporary fixes on equipment and gear
  • Paracord: Versatile cordage for repairs, clotheslines, and securing items
  • Tent Repair Kit: Patches and seam sealers for shelter maintenance
  • Folding Saw/Hatchet: For processing firewood where collecting is permitted
Emergency Preparedness

A basic toolkit prevents minor issues from becoming trip-ending problems. Pack a small container with essential repair items: several yards of duct tape wrapped around a pencil, a multi-tool with pliers and scissors, a small sewing kit with heavy-duty needles and thread, gear-specific repair items (sleeping pad patches, tent pole splints), zip ties in various sizes, and a small roll of baling wire. These simple items can address most common equipment failures. Additionally, learning basic repair techniques before your trip builds self-reliance and problem-solving confidence.

Safety & Navigation

Essential Safety Equipment:
  • First Aid Kit: Comprehensive kit appropriate for group size and activity risk level
  • Maps & Compass: Physical navigation tools that don't require batteries or signal
  • Communication Device: Cell phone, satellite messenger, or radio based on location
  • Emergency Whistle: Simple, effective signaling device for attracting attention
  • Fire Starting Tools: Multiple methods (lighter, matches, ferrocerium rod) for redundancy
Beyond the Equipment

Safety extends beyond carrying equipment to understanding its use. Before camping, learn basic first aid, understand how to navigate using map and compass, research potential hazards at your destination, and create an emergency plan including evacuation routes. Share your detailed itinerary with a responsible person not on the trip, including expected return time and when authorities should be contacted if you don't check in. For beginners, choosing established campgrounds with ranger presence provides an additional safety margin while building experience.

Outdoor Clothing: Comfort in Any Condition

The Layering System Approach

Effective outdoor clothing utilizes a layering approach that adapts to changing weather conditions and activity levels. This system provides maximum versatility while minimizing the total clothing you need to pack:

Base Layer

The base layer sits against your skin, wicking moisture away to keep you dry and comfortable. For camping, select:

  • Synthetic t-shirts that dry quickly after activity
  • Lightweight long underwear for cool evenings and sleeping
  • Merino wool options for excellent odor resistance on multi-day trips

Key point: Avoid cotton, which retains moisture and can create dangerous cooling when wet. Pack extra base layers to ensure you always have dry options after perspiring.

Mid Layer

Mid layers provide insulation by trapping warm air near your body. Essential options include:

  • Fleece jacket or pullover offering versatile warmth-to-weight ratio
  • Lightweight insulated jacket (synthetic or down) for concentrated warmth
  • Softshell jacket combining moderate insulation with wind resistance

Key point: Full-zip designs allow better ventilation control than pullovers. Look for items with chest pockets accessible while wearing a backpack and handwarmer pockets for comfort during downtime around camp.

Outer Layer

The outer layer shields against wind, rain, and snow while allowing perspiration to escape. Essential components:

  • Waterproof/breathable rain jacket with sealed seams and adjustable hood
  • Rain pants for complete protection during sustained precipitation
  • Ventilation features like pit zips and leg vents for temperature regulation

Key point: For beginners, prioritize a quality rain jacket over other outer layer pieces. Look for adjustable cuffs, storm flaps over zippers, and a hood that moves with your head when turning. Even in forecasted good weather, rain protection is essential insurance.

Additional Clothing Considerations
Footwear & Socks
  • Camp shoes: Lightweight, comfortable options for around camp after removing hiking boots
  • Hiking socks: Wool or synthetic blend with cushioning appropriate for your footwear
  • Extra socks: Always pack more pairs than you think needed - dry feet are crucial for comfort
Accessories
  • Hat with brim: Provides sun protection for face, neck, and eyes
  • Warm beanie: Retains significant heat in cool conditions
  • Gloves: Lightweight options for cool mornings and evenings
  • Neck gaiter/buff: Versatile item serving multiple functions from sun protection to warmth

Frequently Asked Questions

A complete basic camping setup typically requires $350-700 for essential quality gear. This includes:

  • Tent: $100-200 for a reliable 3-season option
  • Sleeping bag: $50-120 for a synthetic rectangular or mummy design
  • Sleeping pad: $30-80 for adequate insulation and comfort
  • Cooking system: $50-100 for a basic stove and cookware
  • Lighting: $20-50 for headlamps and lantern
  • Camp furniture: $25-75 for basic chairs and possibly a table
  • Miscellaneous essentials: $50-100 for first aid, water containers, and other necessities

Beginners can significantly reduce initial costs through several approaches:

  • Borrowing equipment for initial trips before committing to purchases
  • Renting gear from outdoor retailers, which typically costs $50-150 per weekend for core items
  • Purchasing quality used equipment from gear swaps, online marketplaces, or outdoor retailer garage sales
  • Focusing first on "the big three" (shelter, sleep system, backpack) with adequate quality, then adding other items gradually

Remember that while it's possible to find extremely low-cost alternatives, extremely cheap gear often leads to poor experiences that discourage continued participation. Budget-conscious beginners should seek value (adequate quality at reasonable prices) rather than simply the lowest possible cost.

Selecting the appropriate tent size involves several considerations beyond simple person count:

Understanding Tent Capacity Ratings

Manufacturer capacity ratings typically represent the maximum number of people who can sleep in the tent with minimal personal space and no extra room for gear. For comfortable camping:

  • Solo campers should consider 1-2 person tents to accommodate gear storage
  • Couples generally find 3-person tents more comfortable than 2-person models
  • Families should typically choose tents rated for at least one more person than their group size
Additional Sizing Factors
  • Interior dimensions: Check the floor dimensions and peak height, not just person capacity. Taller campers may need extra length, while families benefit from greater height for changing clothes
  • Vestibule space: External covered areas provide valuable storage for wet or dirty items without consuming interior space
  • Design efficiency: Dome tents maximize usable space compared to more sharply sloped designs
  • Trip duration: Longer trips typically benefit from more generous sizing to prevent feeling confined
  • Climate considerations: Cold weather camping often requires more interior space for gear storage and changing clothes inside the tent

For car camping where weight and packed size constraints are minimal, erring on the side of extra space significantly enhances comfort. However, backpackers must balance spaciousness against weight and packed size limitations. Many experienced campers eventually own multiple tents optimized for different scenarios and group sizes.

As you gain experience and identify your camping preferences, strategic upgrades maximize your investment value. Prioritize improvements in this general sequence:

  1. Sleep System Components

    Quality sleep directly impacts overall camping enjoyment. Upgrade sleeping pads first (providing both comfort and insulation), followed by sleeping bags appropriate to your typical camping seasons. Superior sleep often distinguishes enjoyable trips from endurance exercises.

  2. Reliable Weather Protection

    A quality tent with proper waterproofing prevents potentially trip-ending situations during adverse weather. Look for fully-sealed seams, adequate ventilation to manage condensation, and a sturdy pole structure that resists wind. Similarly, personal rain gear with proper waterproof/breathable performance transforms rainy days from misery to manageable.

  3. Cooking System Improvements

    Once basic sleeping and shelter needs are addressed, cooking system upgrades significantly enhance daily camp life. Consider more efficient stoves, non-stick cookware that simplifies cleanup, and food storage solutions that better preserve perishables. These improvements make meal preparation less chore-like and more enjoyable.

  4. Comfort Enhancements

    After addressing functional necessities, consider items that improve overall comfort: better camp chairs with proper back support, larger or more stable tables, improved lighting systems, and organizational solutions that create a more ordered campsite.

Base upgrade decisions on your actual experiences rather than marketing claims. After several trips, you'll identify specific gear limitations that directly impact your enjoyment. Focus improvements on resolving these actual pain points rather than pursuing the latest features or specifications. Quality gear appropriate to your specific camping style will provide better long-term value than continually chasing the newest options.

Proper between-trip storage significantly extends gear lifespan and ensures equipment functions properly when needed:

General Storage Principles
  • Clean thoroughly: Remove all dirt, food particles, and especially salt deposits before storage
  • Ensure complete dryness: Moisture leads to mold, mildew, and material degradation
  • Store in moderate conditions: Choose locations with stable temperatures and low humidity
  • Avoid direct sunlight: UV exposure degrades fabrics, plastics, and waterproof coatings
  • Protect from pests: Use sealed containers to prevent rodent damage
Category-Specific Storage
  • Tents: Store loosely folded or rolled (not tightly compressed) in breathable fabric bags rather than the small stuff sacks used during trips. This prevents permanent creases and stress on waterproof coatings.
  • Sleeping bags: Store uncompressed in large cotton or mesh storage sacks (usually included with purchase). Compression during storage damages insulation loft, reducing warmth.
  • Sleeping pads: Self-inflating pads should be stored with valves open and loosely rolled or laid flat. Inflatable pads should be partially inflated or stored with valves open to prevent internal adhesion.
  • Cookware: Ensure complete dryness to prevent corrosion. Store lids separately from pots to prevent scratching non-stick surfaces.
  • Stoves and fuel: Remove all fuel canisters and store separately in well-ventilated areas. Clean stove components of food residue to prevent attracting pests.
  • Electronics: Remove batteries from headlamps, lanterns, and other devices to prevent corrosion damage from battery leakage.

Consider developing a pre-storage checklist to ensure consistent gear care. Many campers find that organizing equipment in clear plastic bins with labels helps maintain order while providing visibility and protection. For those with limited space, prioritize proper storage for expensive or vulnerable items like sleeping bags, tents, and electronics, which suffer most from improper storage conditions.

Even experienced campers occasionally forget essential items. These frequently overlooked categories deserve special attention during packing:

Commonly Forgotten Essentials
  • Tent stakes and guylines: Often separated from the main tent during previous cleaning or drying
  • Lighting: Headlamps, lanterns, and spare batteries/charging cables
  • Proper footwear: Camp shoes, water shoes, or hiking boots depending on activities
  • Weather protection: Rain jackets and pants, especially when forecast appears favorable
  • Toiletries and personal medications: Particularly prescription medications and specialized personal needs
  • Trash bags: Essential for waste management and impromptu rain protection
Kitchen Oversights
  • Can/bottle opener: Often needed but frequently forgotten
  • Dish cleaning supplies: Biodegradable soap, scrubber, and washing container
  • Coffee making equipment: A particularly painful oversight for coffee drinkers
  • Cooking oil and basic seasonings: Dramatically improve camp cooking
  • Proper food storage: Coolers, bear canisters, or food hanging equipment as appropriate
Comfort Items
  • Camp pillow: Often remembered only after the first uncomfortable night
  • Insect repellent: Particularly in transitional seasons when insects may be unexpected
  • Sunscreen: Essential even in cooler conditions or partially cloudy weather
  • Hat and gloves: Even summer camping can experience significant temperature drops at night

Develop a comprehensive packing list based on your specific needs, and review it systematically before each trip. Many experienced campers maintain a digital or physical master list they customize for different trips or seasons. Some organize gear in dedicated bins by category (cooking, sleeping, etc.) to ensure related items stay together. A final "walk-through" of your campsite setup mentally before departing helps identify potential gaps in your equipment.

Launching Your Camping Journey

Building your camping gear collection is an evolving process that develops alongside your outdoor skills and preferences. By focusing first on quality versions of the most essential items - shelter, sleep system, and cooking equipment - you create a foundation that ensures basic comfort and safety.

Remember these guiding principles when selecting your camping gear:

  • Prioritize versatility in your initial purchases, seeking items that serve multiple functions
  • Value reliability over complexity - simpler gear generally means fewer potential failure points
  • Consider your specific camping style and environments rather than generic recommendations
  • Test new equipment at home before relying on it in the field
  • Learn proper care and maintenance to maximize equipment lifespan and performance

The equipment you select significantly influences your camping experience, but remember that gear serves your adventure rather than defining it. Even modest equipment used knowledgeably provides safe, enjoyable outdoor experiences. As your skills develop, your gear preferences will evolve naturally based on actual experiences rather than marketing promises.

With each camping trip, you'll refine both your equipment collection and your outdoor skills. This parallel development creates a virtuous cycle where improved knowledge helps you select better gear, while appropriate equipment enhances your ability to develop new skills and tackle more varied environments.
Prev Outdoor Recreation

Next 返回列表