What Type of Climbing Gear Is Suitable for Beginners?

Discover the essential climbing equipment for beginners - from harnesses to shoes and helmets - ensuring safety, comfort and proper skill development for new climbers.

Why Proper Climbing Gear Matters
  • Quality climbing equipment ensures safety by providing reliable protection during your initial climbing experiences
  • Appropriate gear enhances learning by allowing you to focus on technique rather than equipment concerns
  • Properly fitted equipment improves comfort, making the learning process more enjoyable and sustainable
  • Starting with the right gear builds confidence for beginners while establishing a foundation for future climbing development
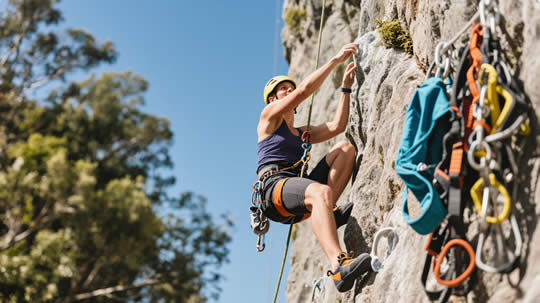
Essential climbing gear items for beginners

Personal Essential Gear: Your Climbing Foundation

The Beginner's Core Climbing Kit

For new climbers, these personal items form the foundation of your climbing kit. They're the pieces you'll use on every climb and should be your first purchases before moving to more specialized equipment:

Climbing Harness

A harness connects you to the rope system and distributes forces across your body during falls. For beginners, focus on these key considerations:

  • Adjustability: Fully adjustable leg loops and waist belt ensure proper fit as you gain experience and for use with different clothing layers
  • Padding: Adequate padding in the waist belt and leg loops provides comfort during extended belay sessions and hanging positions
  • Gear Loops: Four gear loops offer sufficient capacity for indoor climbing and beginning outdoor routes
  • Proper Sizing: When properly fitted, the waist belt should sit above your hip bones, with leg loops comfortably snug but not restricting circulation

All-around harnesses designed for gym and sport climbing represent the best value for beginners, offering versatility as your climbing interests develop. Avoid ultralight alpine models or specialized trad climbing harnesses until your preferences become clearer with experience.

Climbing Shoes

Specialized climbing shoes provide the precision and friction necessary for effective footwork - a fundamental climbing skill. Begin with these characteristics:

  • Neutral Profile: Flat or slightly downturned shoes provide all-day comfort while still offering sufficient performance for skill development
  • Moderate Stiffness: Medium-stiff soles support developing foot strength and technique while reducing foot fatigue
  • Comfortable Fit: Shoes should feel snug without painful pressure points; your toes should be flat or slightly curled
  • Closure System: Velcro straps offer convenience for frequent on/off transitions common during learning

Resist the temptation to purchase aggressive, highly downturned performance shoes initially. These specialized designs often hinder proper technique development and create unnecessary discomfort that can discourage continued participation. Most climbing gyms and outdoor guide services rent shoes, allowing you to experiment with different styles before purchasing.

Climbing Helmet

A climbing helmet protects against falling objects and impacts during falls - particularly important for outdoor climbing. Key features include:

  • Certification Standards: Look for UIAA and EN certifications ensuring the helmet meets international safety requirements
  • Construction Type: Hybrid designs combining hard shell with foam interiors offer good balance of durability and weight
  • Adjustment System: Easily adjustable fit systems accommodate different head sizes and allow space for hats in cold conditions
  • Ventilation: Adequate airflow prevents overheating, especially important during warm weather climbing

While helmets are optional in most indoor climbing environments, they're essential safety equipment for any outdoor climbing. Developing the helmet habit from the beginning creates proper safety practices that serve you throughout your climbing career. Modern climbing helmets are lightweight and comfortable enough that there's little reason not to use one consistently.

Chalk & Chalk Bag

Chalk absorbs hand moisture to improve grip, while a chalk bag provides convenient access during climbing. Consider these factors:

  • Chalk Types: Block chalk (requires crushing), loose chalk (ready to use), or chalk balls (reduces airborne dust)
  • Bag Design: Cylindrical bags with stiff openings allow easy access while climbing
  • Closure System: Drawstring closures prevent chalk spillage during transportation
  • Attachment Method: Belt attachments or carabiner loops secure the bag at the optimal position

Chalk systems represent one of the most affordable components of climbing gear. While differences between chalk types exist, most beginners won't notice significant performance variations. If using chalk indoors, be considerate about minimizing dust, as excessive chalk affects air quality for all climbers. Some gyms require or recommend chalk balls to reduce airborne particulates.

Beginner's Personal Gear Strategy

For most beginners, purchasing personal gear (harness, shoes, helmet, and chalk system) before other equipment makes the most sense. These items are sized to your body, affect your performance and comfort directly, and represent a relatively modest investment compared to ropes and protection equipment. Many climbing gyms and guide services include shared equipment like ropes and quickdraws in their programs but expect participants to have their own personal gear. This approach allows you to develop experience and preferences before investing in more technical pieces. Additionally, purchasing quality personal items reduces long-term costs compared to rental fees for frequent climbing sessions.

Protection Gear: Safety System Components

Belay Devices

Essential Friction Control:
  • Tube-Style Devices: Standard design offering versatility for top-rope and lead belay
  • Assisted-Braking Devices: Enhanced safety features that help catch falls by engaging automatically
  • Compatibility: Must match device to rope diameter and belay technique
  • Learning Curve: Each device requires specific technique that must be properly mastered
  • Versatility: Consider future needs such as rappelling or multi-pitch climbing
Beginner Recommendations

For beginners, assisted-braking devices like the Petzl GriGri, Black Diamond ATC-Pilot, or Mammut Smart offer enhanced safety during the learning process. These devices provide an additional margin of safety while you develop proper belay technique and habits. However, many instructors still recommend learning on traditional tube-style devices first to understand fundamental belay principles. Regardless of device choice, proper instruction from qualified teachers and consistent practice are essential for safe belaying. Never attempt to belay without proper instruction, and always follow manufacturer guidelines for your specific device.

Carabiners & Quickdraws

Connection Components:
  • Locking Carabiners: Essential for critical connections in the safety system
  • Non-Locking Carabiners: Used in quickdraws and for gear organization
  • Quickdraws: Pre-assembled carabiner pairs connected by webbing for sport climbing
  • Gate Types: Solid gate, wire gate, and keylock nose designs offering different benefits
  • Shape Considerations: D-shaped, oval, and HMS/pear shapes for specific applications
Beginning Carabiner Kit

A basic carabiner kit for beginners includes 2-3 locking carabiners for anchors and belay connections, plus 1-2 non-locking carabiners for miscellaneous tasks. For sport climbing, a set of 10-12 quickdraws covers most single-pitch routes. When selecting carabiners, look for smooth gate action, appropriate size for your hands, and clean design that minimizes the potential for cross-loading. All climbing carabiners should be certified to UIAA and EN standards, with strength ratings clearly marked on the spine. Avoid novelty carabiners or non-rated hardware store carabiners that may look similar but lack proper certification for climbing use.

Slings & Webbing

Versatile Connectors:
  • Nylon Runners: Available in various lengths for extending protection or creating anchors
  • Dyneema/Spectra Slings: Lighter and less bulky alternatives to nylon, with less dynamic properties
  • Personal Anchor Systems: Specialized slings designed for connecting to anchors safely
  • Prusik Cords: Smaller diameter accessory cords for creating friction hitches
  • Webbing: One-inch tubular webbing sold by the foot for building anchors and other applications
Basic Sling Selection

For beginners entering outdoor climbing, start with 2-3 shoulder-length (60cm/24") slings and 1-2 double-length (120cm/48") slings. These provide options for extending protection pieces, building simple anchors, and creating safety tethers. Slings should be certified to appropriate standards and inspected regularly for wear, especially at high-friction points. While Dyneema slings offer weight advantages, standard nylon slings provide more dynamic properties and better heat resistance, often making them more suitable for beginners learning anchor systems. Consider adding a pre-made personal anchor system (PAS) for simplified anchor connections once your climbing advances to multi-pitch routes.

Specialized Protection

Advanced Protection Options:
  • Nuts/Stoppers: Passive protection that wedges into rock features
  • Cams: Spring-loaded devices that expand against rock surfaces
  • Hexes: Multifaceted nuts that can be placed in passive or camming modes
  • Tricams: Versatile pieces functioning as both passive and active protection
  • Micro Protection: Specialized small pieces for thin cracks and features
Beginner Approach to Protection

Most beginners should delay purchasing specialized protection until gaining experience with pre-placed protection (bolts and fixed anchors). Traditional protection requires significant knowledge of proper placement techniques, understanding of rock quality, and anchor construction principles. This equipment represents not only a substantial investment but also carries serious safety implications if used incorrectly. Focus initial learning on sport climbing and top-roping where protection is pre-established, then gradually add traditional protection skills under qualified instruction. When ready to begin traditional climbing, consider starting with a basic set of nuts/stoppers before expanding to more complex protection like cams.

Ropes & Hardware: Core Safety Equipment

Selecting Your First Climbing Rope

Your climbing rope is the most critical safety component in the climbing system, serving as the primary connection between climber and belayer. Understanding key rope characteristics helps beginners make appropriate selections:

Rope Diameter & Weight

Rope diameter directly affects handling, durability, and weight considerations:

  • 9.8-10.2mm: Ideal beginner range balancing durability and reasonable weight
  • 10.5mm+: Maximum durability but heavier and stiffer; excellent for top-roping and institutional use
  • 9.0-9.7mm: Lighter weight but less durable; better for experienced climbers or specific applications
  • <9.0mm: Specialized thin ropes for advanced applications; not appropriate for beginners

Beginners should prioritize durability and handling over minimal weight, making 9.8-10.2mm single ropes the sweet spot for initial purchases. These diameters provide good abrasion resistance while maintaining reasonable handling properties for learning proper rope management.

Rope Length & Treatment

Length selection and treatment options significantly impact versatility and performance:

  • Length: 60m (197ft) provides the best balance of coverage and cost for most beginners
  • Alternative Lengths: 50m sufficient for some climbing areas; 70m offers maximum coverage but increased weight
  • Dry Treatment: Factory treatments improve water resistance, dirt repellency, and handling
  • Bicolor/Middle Marks: Visual indicators of the rope's midpoint for safer rappelling

For most beginners, a 60m non-dry treated rope with clear middle marking provides the best value. This length covers most sport routes in North America and Europe while remaining manageable for learning proper rope handling. Add dry treatment if your climbing frequently includes wet conditions or snow/ice environments, understanding this adds 15-25% to the cost.

Dynamic Properties

A climbing rope's dynamic properties determine how it handles forces during falls:

  • Impact Force: Lower ratings provide softer catches but may stretch more during belaying
  • Dynamic Elongation: The percentage the rope stretches during a standardized fall test
  • Static Elongation: The percentage the rope stretches under body weight (affects belaying)
  • Fall Rating: Number of standardized falls the rope can hold before failure (higher is better)

For beginners, moderate dynamic properties offer the best learning platform. Ropes with impact forces between 8.5-9.5kN, dynamic elongation around 30-35%, and static elongation between 7-10% provide a balanced performance profile. Extremely "soft" ropes (low impact force, high elongation) can complicate belaying for beginners, while very "stiff" ropes may deliver harder catches to falling climbers.

Handling & Construction

A rope's construction affects its handling characteristics and longevity:

  • Sheath Percentage: Higher percentages improve durability at the cost of flexibility
  • Sheath Pattern: Different weaving techniques affect handling and resistance to dirt
  • Core Construction: Various approaches to core design influence overall performance
  • Weight per Meter: Weight efficiency varies between manufacturers even at identical diameters

Handling characteristics are somewhat subjective and vary between manufacturers. When possible, handle potential rope purchases before buying to assess the feel. Most major manufacturers produce quality ropes with different handling characteristics; finding one that feels good in your hands improves rope management learning. Rope construction quality is relatively consistent among established climbing brands, making diameter, length, and treatment more important considerations than brand-specific technologies for first-time buyers.

First Rope Recommendation

For most beginners, the ideal first climbing rope is a 60m single rope with 9.8-10.0mm diameter, standard (non-dry) treatment, and clear middle marking. This specification balances durability, handling, versatility, and cost-effectiveness across various climbing disciplines. While specialized ropes offer advantages for specific applications, a general-purpose rope allows beginners to explore different climbing styles while building fundamental skills. Most importantly, purchase your rope from a reputable climbing retailer or manufacturer to ensure proper certification (UIAA and CE/EN), quality control, and accurate specifications. Climbing ropes require specific care and inspection routines; always follow manufacturer guidelines for handling, cleaning, and retirement criteria.

Anchor Systems

Key Anchor Components:
  • Cordelettes: 6-7mm accessory cord for creating anchor systems
  • Anchor-Specific Slings: Pre-sewn loops in various configurations
  • Locking Carabiners: Multiple shapes and locking mechanisms for anchor construction
  • Quicklinks/Rappel Rings: Semi-permanent anchor components
  • Personal Anchor Systems: Specialized equipment for connecting to anchors safely
Anchor Learning Progression

Anchor systems require substantial knowledge and experience to construct safely. Most beginners should focus initially on climbing in environments with fixed anchors (gyms, popular sport climbing areas) while learning proper rope management. When ready to advance to building anchors, seek qualified instruction on appropriate equalization techniques, redundancy principles, and material selection. A basic anchor kit including a 7m length of 7mm cordelette, 2-3 extra locking carabiners, and a personal anchor system provides a foundation for learning. These components allow for practicing basic anchoring skills under supervision before progressing to more complex systems.

Hardware Considerations

Additional Hardware Elements:
  • Belay/Rappel Devices: Various designs for different applications
  • Specialized Carabiners: Belay-specific shapes and security features
  • Rigging Plates: Organize multiple connections at anchors
  • Pulleys: Create mechanical advantage systems
  • Ascenders: Rope climbing and rescue applications
Progressive Hardware Acquisition

Climbing hardware should be acquired progressively as your skills and requirements develop. Begin with fundamental items (belay device, locking carabiners) before expanding to specialized hardware. Each piece of technical hardware requires specific knowledge for proper use, and accumulating equipment beyond your current skill level creates unnecessary expense and potential safety issues through improper application. When selecting hardware, consider material properties: aluminum components offer weight savings but less durability than steel, which is preferred for high-wear applications like rappel devices. All climbing hardware should carry appropriate certification markings (UIAA, CE/EN) indicating compliance with international safety standards.

Essential Accessories: Comfort & Convenience

Climbing Apparel

Performance Clothing Considerations:
  • Breathable Base Layers: Moisture-wicking fabrics for temperature regulation
  • Durable Pants/Shorts: Abrasion-resistant designs allowing full range of motion
  • Layering System: Adaptable clothing combinations for changing conditions
  • Climbing-Specific Features: Articulated knees, gusseted crotches, reinforced wear points
  • Belay Jackets: Insulation for stationary periods between climbs
Starting Simple

While specialized climbing clothing offers performance advantages, beginners can start with versatile athletic wear they may already own. Comfortable, stretchy pants or shorts that allow unrestricted movement, moisture-wicking t-shirts, and lightweight layers work well for initial climbing experiences. As your participation increases, consider investing in climbing-specific pants with reinforced knees and enhanced mobility features. Technical fabrics with quick-drying and durable properties become more valuable as climbing frequency increases. Focus first on functionality and comfort rather than brand names or climbing-specific styling.

Gear Transportation

Carrying Solutions:
  • Rope Bags: Protect climbing ropes and simplify transportation
  • Gym Bags: Compact options for indoor climbing essentials
  • Crash Pads: Portable landing systems for bouldering
  • Approach Packs: Specialized backpacks for carrying gear to climbing sites
  • Gear Organizers: Systems for efficient equipment management
Transport Priorities

For beginners, start with a simple rope bag or dedicated gym bag to organize and protect your initial gear investment. A rope bag with integrated tarp provides critical protection for your climbing rope during transport and at the crag, preventing contamination with dirt and extending rope lifespan. As your gear collection expands, consider a climbing-specific backpack with features designed for equipment organization and comfortable approaches to climbing areas. These specialized packs include external attachment points for ropes, helmets, and hardware, plus reinforced construction to handle the weight and abrasion of climbing equipment.

Hand Care & Recovery

Skin Maintenance Essentials:
  • Climbing Balms: Specialized moisturizers for preventing cracks and splits
  • Skin Repair Products: Accelerate healing between climbing sessions
  • Nail Tools: Files and clippers for managing nail length and shape
  • Tape: Athletic and climbing-specific tape for skin protection
  • Pumice Stones/Sanding Blocks: Manage calluses and prevent tearing
Hand Care Routine

Establishing a consistent hand care routine extends climbing sessions and prevents painful skin injuries. For beginners, a simple kit including climbing-specific balm, athletic tape, and basic nail tools provides the essentials. After climbing, wash hands thoroughly to remove chalk residue, then apply a thin layer of climbing balm to maintain moisture balance. Manage developing calluses with light sanding to prevent excessive buildup that can lead to painful tears. When skin damage does occur, climber-specific repair balms help accelerate healing. Hand maintenance might seem minor compared to other gear considerations, but proper skin care directly impacts your ability to climb consistently during the critical skill development phase.

Maintenance Tools

Gear Care Essentials:
  • Rope Wash: Specialized cleaners for maintaining rope performance
  • Brush Set: Various brushes for cleaning holds and gear
  • Lubricants: Appropriate products for carabiner gates and mechanical devices
  • Gear Inspection Tools: Magnifiers and gauges for safety checks
  • Repair Supplies: Materials for field repairs and maintenance
Preventative Maintenance

Regular maintenance extends gear lifespan and ensures optimal performance. For beginners, start with basic cleaning supplies: mild soap for washing harnesses and slings, a soft brush for removing dirt from gear, and manufacturer-recommended lubricant for carabiner gates. Establish a routine inspection habit, checking equipment for signs of wear before each climbing session. As your equipment collection grows, add specialized items like rope wash and dedicated brushes for different applications. Always follow manufacturer guidelines for cleaning, as improper chemicals or techniques can damage climbing equipment. Keep detailed records of gear purchase dates, usage, and any significant impacts to inform retirement decisions.

Beginner Packages: Budget-Conscious Approaches

Strategic Gear Acquisition for New Climbers

Rather than purchasing everything at once, most beginners benefit from a staged approach to building their climbing kit. This strategy allows for skill development alongside appropriate gear acquisition, spreading costs over time and ensuring equipment matches your evolving interests:

Phase 1: Gym Essentials

Focus on personal equipment needed for indoor climbing:

  • Climbing Shoes: Comfortable, neutral profile ($80-120)
  • Harness: All-around design with adjustable features ($50-75)
  • Chalk Bag & Chalk: Basic system for improved grip ($15-25)
  • Belay Device & Locking Carabiner: After learning proper technique ($30-50)

Approximate Investment: $175-270

This initial kit covers everything needed for indoor climbing at gyms, where ropes and other protection equipment are typically provided. These personal items optimize comfort and performance while building fundamental skills. Many gyms rent shoes and harnesses, allowing experimentation before purchasing. Focus on proper fit and comfort rather than advanced performance features at this stage.

Phase 2: Outdoor Sport Climbing

Add equipment needed for single-pitch sport routes:

  • Climbing Helmet: Essential safety equipment ($60-85)
  • Dynamic Rope: 60m, 9.8-10.0mm diameter ($150-180)
  • Quickdraws: Set of 12 for most single-pitch routes ($100-150)
  • Rope Bag: Protects rope and simplifies transportation ($40-60)
  • Slings & Extra Carabiners: For anchors and versatility ($50-75)

Approximate Investment: $400-550

This equipment expands capabilities to outdoor sport climbing on established routes with permanent protection (bolts). Initial outdoor experience often happens with more experienced partners or guides who may provide shared equipment, allowing gradual acquisition as skills develop. Prioritize safety-critical items (helmet, quality rope) when allocating budget in this phase. This kit, combined with Phase 1 equipment, creates a complete system for most single-pitch sport climbing scenarios.

Phase 3: Specialized Expansion

Add equipment for specific climbing disciplines based on interest:

Traditional Climbing
  • Starter protection rack ($300-500)
  • Nut tool and specialized gear ($50-75)
Multi-Pitch Climbing
  • Personal anchor system ($25-40)
  • Additional belay/rappel equipment ($50-100)
Bouldering Focus
  • Crash pad ($150-250)
  • Specialized shoes ($100-140)

Approximate Investment: Variable based on discipline

This phase represents specialized expansion based on your developing interests and climbing style preferences. Rather than purchasing equipment across all disciplines, focus on deepening capabilities in areas that most engage your interest. At this stage, gear selection becomes more personalized based on specific climbing objectives, physical characteristics, and performance preferences. Seek specialized instruction appropriate to each new discipline before committing to equipment purchases.

Cost-Saving Strategies
  • Purchase in phases aligned with skill development rather than all at once
  • Partner with experienced climbers who may share specialized equipment
  • Consider previous-generation models with substantial discounts (particularly for shoes and harnesses)
  • Watch for seasonal sales at specialty retailers (typically occur during model transitions)
  • Explore "cosmetic seconds" from major manufacturers (functional equipment with minor cosmetic flaws)
  • Participate in gear swaps organized by climbing gyms and clubs
  • Rent specialized equipment for occasional use or trying before purchasing
  • Prioritize safety-critical items when allocating limited budget resources

When considering used equipment, exercise caution with safety-critical items like ropes, harnesses, and protective gear. These items can sustain invisible damage and have limited lifespans even with proper use. Generally, hard goods (carabiners, belay devices) are safer to purchase used than soft goods (ropes, slings, harnesses) if obtained from reliable sources with known history. Always thoroughly inspect any used equipment and when in doubt, prioritize safety over cost savings. Many manufacturers and retailers offer package discounts when purchasing multiple components together, which can provide savings while ensuring compatible, new equipment.

Frequently Asked Questions

The rent-vs-buy decision depends on several factors including frequency of climbing, long-term commitment, and financial considerations:

When Renting Makes Sense
  • Trial Period: If you're still determining whether climbing will become a regular activity
  • Infrequent Participation: Climbing less than 1-2 times monthly makes rental economically logical
  • Trying Different Styles: Experimenting with various climbing disciplines before committing
  • Hard-to-Transport Items: Crash pads and other bulky equipment for occasional use
  • Specialized/Expensive Items: Traditional protection racks for occasional trad climbing
When Purchasing Makes Sense
  • Regular Participation: Climbing 2+ times monthly typically makes purchasing more economical
  • Body-Specific Items: Shoes and harnesses benefit from consistent fit and personal adjustment
  • Hygiene Considerations: Personal items like shoes minimize shared-use concerns
  • Performance Optimization: Own equipment allows fine-tuning to your specific preferences
  • Long-Term Investment: Quality gear properly maintained serves for multiple years

A hybrid approach often works best: purchase personal items (shoes, harness, chalk bag) even as a beginner, while renting or borrowing specialized equipment (ropes, protection) until your commitment level and specific interests become clearer. Most climbing gyms offer reasonably priced rental packages for beginners, which provide an excellent opportunity to try different gear types and styles before investing. As your climbing frequency increases, gradually build your personal kit starting with the items you use most frequently.

The ideal fit for beginner climbing shoes balances performance with comfort to support skill development without unnecessary discomfort:

Beginner Shoe Fitting Guidelines
  • Snug But Not Painful: Shoes should feel secure with minimal internal movement, but not cause pain when standing normally
  • Toe Position: Toes should be flat or very slightly curled, not severely bent or compressed
  • Heel Fit: No significant air pockets in the heel cup, but also no painful pressure points
  • Width Considerations: Sides of feet should feel secure without uncomfortable lateral compression
  • Standing Comfort: You should be able to stand in the shoes comfortably for 10-15 minutes
Common Beginner Fitting Mistakes
  • Excessive Downsizing: Many beginners mistakenly believe extreme tightness improves performance
  • Insufficient Snugness: Shoes that are too loose reduce sensitivity and precision on small footholds
  • Inappropriate Models: Highly aggressive shoes designed for advanced climbing often hinder proper technique development
  • Ignoring Manufacturer Sizing: Different brands and models have distinct sizing characteristics

The "performance vs. comfort" spectrum shifts as your climbing advances. Beginners should prioritize reasonable comfort that allows focusing on technique development and longer climbing sessions. As your foot strength increases and technical ability develops, you may choose more specialized shoes with performance-oriented fits for specific climbing styles. Most climbing shoes stretch slightly with use (synthetic less than leather), so account for minimal break-in when fitting. When possible, try on multiple brands and models, as each uses different lasts (foot forms) that may match your foot shape better than others.

Understanding when to retire climbing equipment is a critical safety skill. Different gear categories have specific replacement indicators:

Soft Goods (Textile Components)
  • Climbing Ropes: Replace when showing signs of core exposure, significant sheath damage, severe discoloration, flat spots, or after sustaining major falls/impacts. Most manufacturers recommend retirement after 5-7 years even with light use.
  • Harnesses: Retire when showing fraying at load-bearing points, significant discoloration, damaged/worn belay loop, or after 5-7 years of regular use per manufacturer guidelines.
  • Slings/Runners: Replace when showing signs of abrasion, cuts, fraying, discoloration from chemicals/UV exposure, or after 3-5 years depending on use frequency.
Hard Goods (Metal Components)
  • Carabiners: Retire immediately if showing cracks, significant gouges, gate function issues, or excessive wear at load-bearing points. Otherwise, replace based on manufacturer guidelines, typically 5-10 years.
  • Belay Devices: Replace when showing deep grooves from rope wear, cracks, sharp edges that could damage ropes, or significant aluminum oxide build-up.
  • Protection Devices: Retire cams with damaged trigger wires, springs, or significant cam lobe wear. For passive protection, check for deformation, cracks, or deep gouges.
Personal Equipment
  • Helmets: Replace after any significant impact, when showing cracks or dents, damaged adjustment system, or according to manufacturer timeline (typically 5-10 years from manufacture date).
  • Climbing Shoes: Retire when showing holes in the rand or sole that compromise performance, delamination issues, or when resoling is no longer effective.

Always follow these general principles when evaluating climbing gear:

  • Manufacturer Guidelines: Always prioritize specific retirement criteria from your equipment's manufacturer
  • When in Doubt, Replace: If uncertain about equipment integrity, err on the side of caution
  • Document Critical Events: Keep records of major falls, impacts, or unusual loading events
  • Consider Invisible Damage: Chemical exposure, improper storage, and UV degradation can create damage not immediately visible

Establish a regular gear inspection routine, checking all equipment before each climbing session and performing more thorough evaluations periodically. When retiring safety-critical equipment, destroy it before disposal to prevent potential reuse that could endanger others.

While there's significant overlap between indoor and outdoor climbing equipment, several important distinctions affect gear selection for each environment:

Equipment Differences
Gear CategoryIndoor ConsiderationsOutdoor Considerations
Climbing ShoesEmphasis on comfort for longer sessions; synthetic materials for durability on textured wallsMore specialized designs based on rock type; greater durability needs for abrasive surfaces
RopesOften provided by gyms; shorter lengths (30-40m) sufficient; typically subject to more frequent fallsLonger lengths (60-70m standard); dry treatments for variable conditions; greater emphasis on durability against rock abrasion
HelmetUsually optional in gyms with controlled environments and padded floorsEssential safety equipment for protection against rockfall and impacts during falls
QuickdrawsOften provided by gyms; lighter-weight options sufficient for controlled environmentsHeavier-duty versions with greater durability; often require longer slings for reducing rope drag on wandering routes
Additional Outdoor Requirements
  • Anchor Building Materials: Outdoor climbing often requires constructing or extending anchors
  • Weather Protection: Gear for variable conditions including rain covers and sun protection
  • Approach Equipment: Packs, shoes, and supplies for accessing remote climbing areas
  • Environmental Considerations: Leave No Trace equipment and waste management systems

From a practical perspective, most personal protective equipment (harnesses, belay devices, carabiners) works effectively in both environments. The primary gear expansion when transitioning from indoor to outdoor climbing involves acquiring equipment for the less controlled outdoor environment and addressing the increased self-sufficiency required. Many climbers maintain some equipment separation - designating certain items for gym use where they experience greater wear from frequent use, while preserving other gear specifically for outdoor adventures to maximize lifespan of critical safety components.

When transitioning from indoor to outdoor climbing, prioritize proper instruction in outdoor-specific techniques and safety practices alongside equipment acquisition. The controlled indoor environment significantly differs from variable outdoor conditions, requiring additional knowledge and risk management strategies that extend well beyond equipment considerations.

Climbing gear represents a significant investment that varies based on climbing discipline, quality level, and completeness. Here's a breakdown of typical costs for beginner-appropriate equipment:

Essential Personal Equipment (Indoor Focus)
  • Climbing Shoes: $80-120 for entry-level models with neutral profiles
  • Harness: $50-75 for all-around designs with adjustable features
  • Chalk Bag & Chalk: $15-25 for complete system
  • Belay Device & Locking Carabiner: $30-50 combined

Subtotal: $175-270

Outdoor Expansion (Sport Climbing)
  • Climbing Helmet: $60-85 for beginner-appropriate models
  • Dynamic Rope (60m): $150-200 depending on diameter and treatments
  • Quickdraws (Set of 12): $100-180 based on quality level
  • Rope Bag: $40-60 for basic protection and transportation
  • Additional Hardware (Slings, Carabiners): $60-100 for basic anchor components

Subtotal: $410-625

Traditional Climbing Addition
  • Starter Protection Rack: $300-600 for basic selection of passive and active protection
  • Specialized Hardware: $75-150 for nut tools, additional carabiners, etc.

Subtotal: $375-750

Cost Management Strategies
  • Phased Purchasing: Acquire equipment progressively as skills and interests develop
  • Package Deals: Many retailers offer starter kits with harness, belay device, and carabiners at discounted prices
  • Previous Generation Equipment: Substantial discounts on last year's models with minimal functional differences
  • Used Equipment (With Caution): Hard goods (carabiners, belay devices) can be purchased used from reliable sources if properly inspected
  • Rental Programs: Some specialty retailers offer "rent-to-own" programs that apply rental fees toward purchase

For most beginners, the wisest approach involves investing first in quality personal equipment (shoes, harness, belay device) while utilizing rentals, borrowing from partners, or club equipment for more specialized items until your climbing style preferences become clear. This progressive approach typically costs $200-300 for initial participation, with additional incremental investments as your climbing evolves. Remember that quality climbing equipment, properly maintained, typically lasts for many years, making the long-term value proposition more favorable than the initial investment might suggest.

Building Your Climbing Foundation

Assembling your climbing gear collection represents an exciting step in your development as a climber. By focusing first on quality personal equipment and gradually expanding your kit alongside your skills, you create a solid foundation for safe and enjoyable climbing experiences.

As you begin your climbing journey, remember these guiding principles:

  • Safety should always be your primary consideration when selecting equipment
  • Knowledge and proper technique are more important than equipment specifications
  • Quality gear appropriately matched to your current abilities enhances learning
  • Progressive acquisition aligned with skill development optimizes both performance and budget
  • Seek instruction from qualified teachers when learning new climbing disciplines

The climbing community offers abundant resources for developing both your technical skills and equipment knowledge. Local climbing gyms typically provide beginner courses covering essential safety skills and basic gear use. Many specialty retailers offer equipment clinics where you can handle different options before purchasing. Online resources from manufacturers and climbing organizations provide detailed information about proper gear selection, use, and maintenance.

With thoughtfully selected equipment supporting your development, you're well-positioned to enjoy the remarkable physical, mental, and social benefits that climbing provides. Remember that climbing gear serves your adventure rather than defining it - focus on developing skills, building partnerships, and experiencing the joy of moving on rock rather than accumulating equipment beyond your current needs.
Prev Hiking

Next 返回列表