What Cycling Gear Is Best for Beginners?

Discover the essential cycling equipment for new riders - focusing on comfort, safety, and value without unnecessary complexity or expense.

Why Proper Cycling Gear Matters
  • The right beginner equipment enhances riding comfort, encouraging longer rides essential for building endurance
  • Quality safety gear provides vital protection during the higher-risk learning phase
  • Well-chosen starter components offer reliability without the premium cost of professional-grade equipment
  • Appropriate beginner gear accommodates technique development while allowing for growing skills
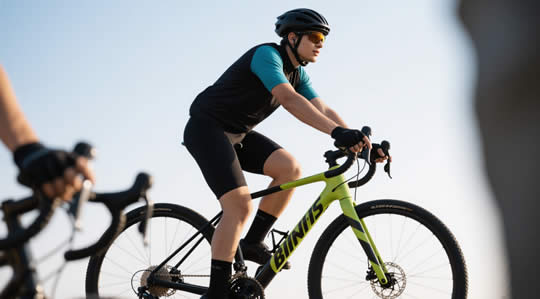
Essential cycling gear for beginners: bike, helmet, and basic accessories

Choosing Your First Bike: Finding the Perfect Match

Bicycle Types for Beginners

Selecting the right bicycle type is the foundation of your cycling journey. For beginners, certain styles offer better comfort, versatility, and learning potential:

Hybrid Bikes

The ideal all-purpose option for most beginners, combining versatility with comfort:

  • Upright Riding Position: More comfortable and confidence-inspiring than aggressive forward-leaning postures
  • Versatile Tire Design: Medium-width tires handle both pavement and light trails effectively
  • Simplified Gearing: Typically 7-21 speeds, providing adequate range without overwhelming complexity
  • Mounting Points: Attachments for fenders, racks, and water bottles enhance practical utility

Perfect for: Recreational riding, commuting, fitness, and exploring mixed terrain. The Swiss Army knife of bikes, hybrids make an excellent first choice while you determine your specific cycling interests.

Entry-Level Road Bikes

Designed for speed and efficiency on paved surfaces:

  • Lightweight Frame: Aluminum frames balance weight, durability, and affordability
  • Drop Handlebars: Multiple hand positions for comfort on longer rides
  • Narrower Tires: Less rolling resistance for improved speed and efficiency
  • Performance-Oriented: More responsive handling and quicker acceleration

Best for: Beginners specifically interested in fitness riding, longer distances, or eventual group riding. Modern entry-level road bikes feature more comfortable geometry than professional models, making them appropriate for new cyclists focusing on pavement riding.

Recreational Mountain Bikes

Built for off-road stability and durability:

  • Robust Construction: Designed to withstand bumps, roots, and trails
  • Wide, Knobby Tires: Provide traction on loose or uneven surfaces
  • Front Suspension: Entry-level models typically include basic front shock absorption
  • Wide Gear Range: Multiple low gears assist with climbing steep terrain

Ideal for: Beginners interested in trail exploration, off-road adventures, or riding in areas with poor road conditions. Even if primarily used on pavement, recreational mountain bikes offer durability and stability that builds confidence.

Comfort/City Bikes

Prioritizing ease-of-use and practicality:

  • Relaxed Geometry: Very upright position minimizes back and neck strain
  • Step-Through Frames: Many models feature low-entry frames for easy mounting
  • Cushioned Saddles: Wider, padded seats enhance comfort for shorter rides
  • Practical Features: Often include fenders, lights, and cargo capabilities

Perfect for: Urban riding, short commutes, casual outings, and riders prioritizing comfort over performance. These bikes excel at practicality for everyday transportation and leisurely neighborhood exploration.

Key Considerations for Your First Bike
Fit & Sizing

Proper fit is crucial for comfort, efficiency, and injury prevention:

  • Standover Height: With feet flat on the ground, you should have 1-2 inches of clearance above the top tube
  • Reach: Handlebars should be accessible without overextending or bunching up your torso
  • Professional Fitting: Most bike shops offer basic fitting services with purchase
  • Test Rides: Always test ride multiple sizes before purchasing
Budget Considerations

Quality entry-level bikes typically start around $400-500, with diminishing returns above $1000 for beginners:

  • Under $300: Generally low-quality components with limited durability; often better to buy used than new at this price point
  • $400-700: The sweet spot for most beginners—reliable frames and components that will perform consistently
  • $700-1000: Noticeable improvements in weight, shifting performance, and braking
  • Used Options: Quality used bikes often provide better value than budget new models
Avoid Department Store Bikes

While temptingly inexpensive, mass-market bikes from non-specialty retailers typically feature poor-quality components, improper assembly, and minimal after-sale support. These bikes often lead to disappointing experiences and can actually discourage continued cycling. Instead, purchase from dedicated bike shops (local or online) that specialize in bicycles, offer proper sizing, and provide warranty service.

Essential Safety Gear: Non-Negotiable Protection

Helmets

The Most Critical Safety Investment:
  • Certification Standards: Look for CPSC, ASTM, or EN1078 safety certifications
  • Proper Fit: Helmets should sit level on your head with minimal movement
  • Adjustment Systems: Quality retention systems ensure security during rides
  • Ventilation: Adequate airflow prevents overheating, especially in warm weather
  • Visibility Features: Bright colors and reflective elements enhance rider visibility
Helmet Types for Different Riding Styles

Road/recreational helmets feature aerodynamic designs with maximum ventilation, ideal for most beginners. Mountain bike helmets provide additional rear head coverage and often include visors. Urban/commuter helmets prioritize everyday practicality with integrated features like light mounts. For beginners, a versatile recreational helmet offers the best balance of ventilation, protection, and value without specialized features you may not need yet.

Critical Safety Note: Always replace any helmet involved in a crash, even if visual damage isn't apparent. Impact forces can compromise internal protective structures.
Recommended Beginner Helmets:

Value Option: Giro Register MIPS

Excellent protection with MIPS technology at an affordable price point ($65-80).

Mid-Range: Specialized Align II MIPS

Outstanding ventilation and comfort with advanced protection ($50-70).

Visibility & Signaling

Being Seen and Communicating Intent:
  • Lights: Front white and rear red lights are essential, especially for low-light conditions
  • Reflectors: Wheel, pedal, and frame reflectors increase passive visibility
  • Reflective Clothing: Reflective elements on clothing dramatically improve visibility
  • Bell/Horn: Audible signaling alerts pedestrians and other cyclists to your presence
  • Hand Signals: Learn basic hand signals to communicate turns and stops to vehicles
Lighting Requirements

For visibility to others, lights should produce at least 50 lumens in front (white) and 10 lumens in rear (red). For actually illuminating your path in darkness, front lights should generate 200+ lumens. USB rechargeable lights offer better long-term value than battery-powered models. Many localities legally require lights between sunset and sunrise, but using them during daylight hours significantly increases visibility to motorists.

Recommended Beginner Light Sets:

Budget Set: Planet Bike Blaze/Superflash

Reliable, weather-resistant, and bright enough for most urban situations ($45-60).

Rechargeable Value: Cygolite Metro/Hotshot

Excellent brightness and battery life with USB recharging convenience ($70-90).

Security

Protecting Your Investment:
  • Lock Types: U-locks provide superior security; cable locks offer convenience but less protection
  • Proper Locking Technique: Secure both frame and wheels to immovable objects
  • Lock Rating: Look for Sold Secure or ART Foundation security ratings
  • Weight Considerations: Higher security typically means heavier locks
  • Registration: Register your bike's serial number with local authorities and databases
Selecting the Right Lock

Your lock should be appropriate for your location and locking duration. High-crime areas require more robust protection. The general rule: spend 10% of your bike's value on securing it. For most beginners with entry-level bikes, a mid-range U-lock provides adequate security without excessive weight. Consider your typical destinations—university campuses and city centers typically require stronger security than suburban areas.

Recommended Beginner Locks:

Budget Security: Kryptonite Keeper U-Lock

Good protection for lower-risk areas with manageable weight ($40-55).

Mid-Range: Abus 410 Ultra

Excellent balance of security, weight, and price for most users ($60-80).

Eye Protection

Safeguarding Your Vision:
  • UV Protection: Always choose glasses with 100% UVA/UVB protection
  • Impact Resistance: Sports-specific eyewear provides better protection than fashion sunglasses
  • Lens Tints: Different colors optimize visibility in various lighting conditions
  • Ventilation: Anti-fog features prevent vision obstruction during exertion
  • Fit Considerations: Proper fit prevents slipping during bumpy rides
Why Cyclists Need Eye Protection

Beyond sun protection, cycling eyewear shields your eyes from airborne debris, insects, wind, and potential crashes. Even at modest speeds, wind can cause eye dryness and irritation. For riders wearing prescription glasses, consider sports models designed to fit over your regular eyewear or investigate prescription cycling glasses if you become a regular rider. Clear or yellow lenses are excellent for low-light conditions, while darker tints work better in bright sunlight.

Recommended Beginner Eyewear:

Budget Option: Tifosi Jet

Lightweight frame with quality optics at an affordable price ($25-40).

Versatile Pick: Goodr Cycling Glasses

Non-slip, polarized lenses with stylish designs suitable for daily use ($25-35).

Beginner-Friendly Cycling Apparel

Finding the Balance: Comfort Without Complexity

Cycling-specific clothing enhances comfort and performance, but beginners don't need the full kit immediately

Shorts & Padding

The most important clothing upgrade for new cyclists:

  • Padded Liners: Chamois padding reduces pressure points and prevents chafing
  • Beginner Options: Padded liner shorts worn under regular clothing offer discreet comfort
  • Fit Considerations: Cycling shorts should fit snugly without restriction
  • Material Quality: Look for moisture-wicking fabrics and flatlock seams

While experienced cyclists wear traditional spandex cycling shorts, beginners often prefer more casual options like mountain bike shorts (with inner padding and looser outer layer) or padded liners worn under regular clothes. Quality padding makes a significant difference in comfort, especially for rides over 30 minutes.

Weather Protection

Extending your riding season and conditions:

  • Wind/Rain Jacket: Packable, cycling-specific shells offer weather protection with proper ventilation
  • Arm/Leg Warmers: Removable layers adapt to changing temperatures during rides
  • Gloves: Provide warmth, grip improvement, and palm protection
  • Caps/Headbands: Keep ears warm and fit under helmets

Start with versatile pieces that extend your comfort range. A lightweight, packable jacket that blocks wind and light rain dramatically increases the conditions you can ride in comfortably. Technical fabrics designed for cycling offer better moisture management and freedom of movement than regular clothing, especially in challenging weather.

Starting with What You Have

Using existing athletic wear effectively:

  • Moisture-Wicking Materials: Synthetic or merino wool athletic shirts work well for cycling
  • Layering Principles: Multiple thin layers offer better adaptability than single heavy garments
  • Athletic Shorts: Can work for shorter rides when paired with padded liners
  • Potential Issues: Regular clothes may cause chafing or restrict movement on longer rides

While cycling-specific clothing offers advantages in comfort and function, beginners can start with existing athletic wear for shorter rides. The moisture-wicking properties found in running or gym clothes work well for cycling. Avoid cotton (especially for layers touching skin) as it retains moisture and becomes uncomfortable when wet from sweat or rain.

Footwear Options

From casual to clipless systems:

  • Flat Pedals: Any supportive athletic shoe works with standard platform pedals
  • Cycling-Specific Shoes: Stiffer soles improve power transfer and comfort
  • Clipless Systems: Advanced pedal/shoe combinations that attach your feet to pedals
  • Beginner Recommendation: Start with quality flat pedals and athletic shoes

Most beginners should start with flat pedals and regular athletic shoes while developing basic handling skills. Once comfortable with bike control, consider cycling-specific shoes with stiffer soles that improve power transfer and reduce foot fatigue on longer rides. Clipless pedal systems (which actually attach your shoes to the pedals) offer performance benefits but require practice and adjustment, making them better as a secondary upgrade.

Budget-Friendly Clothing Strategy

Build your cycling wardrobe gradually, prioritizing items that provide the biggest comfort improvement:

First Purchases
  • Padded cycling shorts/liners ($30-60)
  • Cycling gloves ($15-30)
  • Moisture-wicking jerseys/shirts ($25-40)
  • Lightweight windproof/water-resistant jacket ($40-80)
Money-Saving Tips
  • Shop previous season clearance sales
  • Consider quality house brands (REI, Decathlon)
  • Look for starter bundles (jersey + shorts)
  • Invest in versatile pieces that work in multiple conditions
Later Additions
  • Additional shorts/jerseys for longer rides
  • Cycling-specific shoes
  • Cold-weather gear (thermal tights, jacket)
  • Rain-specific clothing

Essential Accessories for New Cyclists

Repair & Maintenance

Roadside Essentials:
  • Spare Tube: Matching your bike's wheel size and valve type
  • Tire Levers: For removing tires during tube replacement
  • Mini-Pump or CO2 Inflator: To refill tires after repairs
  • Multi-Tool: With hex wrenches and screwdrivers for adjustments
  • Patch Kit: For emergency repairs of existing tubes
Learning Basic Repairs

Knowing how to fix a flat tire is the single most valuable maintenance skill for cyclists. This simple repair can mean the difference between a minor inconvenience and being stranded miles from home. Many bike shops offer free or low-cost basic maintenance classes, or you can find excellent tutorials online. Practice at home before you need these skills on the road.

Recommended Bundle:

Blackburn Starter Kit or similar ($40-60) provides all basic roadside repair essentials in a compact package.

Hydration & Nutrition

Fueling Your Ride:
  • Water Bottles: Standard cycling bottles (20-24oz) fit frame cages
  • Bottle Cages: Secure attachments for carrying water on your frame
  • Hydration Packs: Backpack systems for longer rides or when bottles aren't sufficient
  • Energy Foods: Easily digestible carbohydrates for rides over 60-90 minutes
  • Electrolyte Supplements: Replace minerals lost through sweat during intense or hot rides
Hydration Guidelines

Proper hydration significantly impacts performance and comfort. As a general rule, cyclists should drink one bottle (20-24oz) per hour of riding in moderate conditions, increasing to two bottles per hour in hot weather. Start drinking early in your ride—by the time you feel thirsty, you're already dehydrated. For rides under 60-90 minutes, plain water is usually sufficient; for longer efforts, consider sports drinks or electrolyte tablets to replace lost minerals.

Recommended Setup:

Two quality bottles ($8-12 each) and bottle cages ($10-15 each) provide adequate hydration for most beginner rides.

Navigation & Tracking

Finding Your Way:
  • Phone Mounts: Secure smartphone holders for handlebars
  • Cycling Apps: Free applications provide route planning, tracking, and navigation
  • Basic Computers: Track speed, distance, and time without smartphone dependency
  • Battery Packs: Extended power for longer rides using phone navigation
  • Traditional Maps: Waterproof cycling maps work without battery or signal
Beginner-Friendly Apps

Free applications like Strava, Komoot, and Ride with GPS offer excellent functionality for beginners. These apps track your rides, provide navigation, and help discover popular routes. Many include features to notify emergency contacts of your location or unexpected stops. While advanced cyclists often use dedicated GPS computers, smartphones with quality mounts provide sufficient functionality for most beginners at no additional cost.

Recommended Option:

Quadlock, SP Connect, or similar quality phone mount ($30-50) with a weather-resistant case for existing smartphone.

Storage Solutions

Carrying Essentials:
  • Saddle Bags: Compact storage under your seat for repair essentials
  • Frame Bags: Utilize empty space within your bike's frame triangle
  • Handlebar Bags: Accessible storage for frequently needed items
  • Panniers: Larger bags that attach to racks for commuting or touring
  • Backpacks: Versatile off-bike solution, but can cause back sweat
Choosing the Right Storage

For recreational rides, a medium saddle bag (20-40 cubic inches) typically provides sufficient space for repair essentials, keys, and small snacks. Riders carrying more gear, commuting, or traveling longer distances benefit from frame, handlebar, or rack-mounted bags. On-bike storage is generally more comfortable than carrying items in jersey pockets or backpacks, especially on longer rides. Look for water-resistant materials and secure mounting systems.

Recommended Starter:

Medium saddle bag from Topeak, Blackburn, or similar ($20-35) offers sufficient space for repair essentials without excess bulk.

Visibility Enhancers

Beyond Basic Lights:
  • Reflective Ankle Bands: Motion catches driver attention and identifies you as a cyclist
  • Reflective Vest/Jacket: Dramatically increases visibility, especially in low light
  • Spoke Reflectors: Create visible wheels in vehicle headlights
  • Daytime Running Lights: Specialized lights designed for visibility in daylight
  • Reflective Tape: Affordable addition to increase frame and equipment visibility
The Science of Being Seen

Studies show that contrast and movement are key factors in cyclist visibility. Reflective materials on moving parts (pedals, ankles, wheels) create distinctive patterns that help drivers identify cyclists more quickly. High-contrast clothing (fluorescent during daylight, reflective in darkness) dramatically increases detection distance and time. While lights are essential, combining them with reflective elements creates multiple visual cues for improved safety.

Recommended Addition:

Reflective ankle bands ($10-15) provide excellent visibility improvement per dollar with their distinctive pedaling motion pattern.

Comfort Enhancers

Small Upgrades, Big Difference:
  • Padded Gloves: Reduce hand numbness and improve grip
  • Upgraded Saddle: Proper width and padding for your anatomy
  • Cycling Chamois Cream: Reduces friction on longer rides
  • Handlebar Tape: Cushioned tape absorbs vibration
  • Sunscreen: Essential protection during extended outdoor exposure
Finding Your Perfect Saddle

Contrary to common assumptions, ultra-padded saddles aren't usually more comfortable for actual cycling. Finding the right saddle involves matching it to your sit bone width and riding position. Many bike shops offer measurement tools or test saddles to find your ideal match. For most beginners, a moderate-width saddle with medium padding provides the best balance. Women-specific designs accommodate typically wider female sit bones and different anatomical needs.

Recommended First Upgrade:

Quality cycling gloves ($20-35) provide immediate comfort improvement and protection in case of falls.

Essential Starter Kit: What You Actually Need

The Beginner's Smart Shopping Strategy

Building your cycling kit intelligently balances immediate needs with strategic investments

PriorityItemsBudget RangeWhy It Matters
Immediate
  • Helmet
  • Lights (front & rear)
  • Lock (if leaving bike unattended)
$120-200These safety-critical items should be purchased immediately with your bike. They protect you, make you visible to others, and secure your investment.
High
  • Padded shorts/liners
  • Water bottle & cage
  • Basic repair kit & spare tube
  • Cycling gloves
$100-150These items significantly enhance comfort and self-sufficiency. They address the most common sources of discomfort (saddle pressure, hand fatigue) and prepare you for basic mechanical issues.
Medium
  • Cycling-specific jersey
  • Saddle bag
  • Cycling sunglasses
  • Phone mount
$100-180These additions improve the overall cycling experience with purpose-built functionality and convenience. Acquire these as your riding frequency increases beyond occasional use.
Later
  • Cycling-specific shoes
  • Weather-specific clothing
  • Upgraded accessories
  • Bike computer
$200-350+These specialized items enhance performance and expand riding possibilities. They make sense after you've established cycling as a regular activity and understand your specific needs and preferences.
Budget-Stretching Strategies

Consider package deals when buying your bike—many shops offer discounted helmet/light combinations or essential accessories bundles with bike purchases. For clothing and accessories, previous season clearance sales typically offer 30-50% discounts on functionally identical items. Quality house brands from established retailers (REI, Decathlon, Chain Reaction) often provide 90% of the functionality at 60% of the price compared to premium brands.

Sample Beginner Setups by Riding Style

Casual/Recreational
For weekend path rides and neighborhood exploration:
  • Bike: Hybrid or comfort ($400-600)
  • Essential Gear:
    • Basic helmet ($40-60)
    • Standard lights set ($30-50)
    • Cable lock ($25-40)
    • Water bottle & cage ($15-25)
  • Comfort Add-ons:
    • Padded liner shorts ($30-50)
    • Basic gloves ($15-25)
    • Sunglasses ($20-40)

Total Investment: $575-890

Focuses on basic comfort and safety for shorter, leisurely rides. Uses existing athletic wear when possible, with minimal cycling-specific clothing.

Fitness/Road
For longer fitness rides and potential group riding:
  • Bike: Entry-level road or fitness hybrid ($700-1000)
  • Essential Gear:
    • Performance helmet ($60-100)
    • Quality light set ($70-100)
    • Water bottles & cages (2x) ($30-40)
    • U-lock ($50-70)
  • Performance Clothing:
    • Padded cycling shorts ($40-80)
    • 1-2 cycling jerseys ($40-80 each)
    • Cycling gloves ($20-35)
    • Cycling socks ($10-15)
  • Support Items:
    • Saddle bag with repair essentials ($40-60)
    • Phone mount ($30-40)

Total Investment: $1140-1700

Balances performance and comfort for longer rides. Includes basic cycling-specific clothing to enhance endurance and enjoyment on rides over 10 miles.

Commuting
For reliable transportation to work/school:
  • Bike: Commuter or touring hybrid ($500-800)
  • Essential Gear:
    • Commuter helmet ($50-80)
    • High-visibility light set ($80-120)
    • Heavy-duty U-lock ($70-100)
    • Fenders ($30-60)
    • Rear rack ($30-60)
  • Practical Add-ons:
    • Panniers/bags ($60-120)
    • Reflective ankle bands ($10-15)
    • Packable rain jacket ($60-100)
    • Padded liner shorts ($30-50)

Total Investment: $920-1505

Prioritizes reliability, visibility, and practicality for daily transportation. Includes weather protection and cargo capacity for everyday commuting needs.

Frequently Asked Questions About Beginner Cycling Gear

For short, casual rides (under 30 minutes), regular athletic wear works fine. However, as ride duration increases, cycling-specific clothing offers significant comfort advantages:

  • Padded shorts prevent saddle discomfort, the most common complaint from new riders. For rides over 30-45 minutes, they dramatically improve comfort and enjoyment. Budget-friendly options include padded liners worn under regular shorts for a less "cyclist" appearance.
  • Cycling jerseys offer practical features like rear pockets, moisture-wicking fabrics, and longer backs for proper coverage when leaning forward. They're beneficial but less essential than padded shorts for beginners.
  • Cycling gloves reduce hand numbness and provide protection in falls. They're worth considering even for casual riders, especially on longer outings.

A gradual approach works well for most beginners: start with padded shorts or liners, add gloves if you experience hand discomfort, and consider jerseys once you're regularly riding longer distances. Quality athletic wear you already own can serve other needs initially while you determine your commitment level.

Both options have distinct advantages for beginners:

Used Bike Advantages:
  • Better component quality for the same budget (often 30-50% more bike for your money)
  • Lower financial risk while determining your commitment level
  • Reduced depreciation if you decide to sell later
  • Environmental benefits of reusing existing products
New Bike Advantages:
  • Full manufacturer warranty (typically 1-lifetime on frame, 1-2 years on components)
  • Latest technology and standards
  • No hidden wear or damage
  • Professional assembly and initial adjustments included
  • Often includes basic fit services and initial tune-ups

For beginners, quality used bikes from reputable sources often provide excellent value. However, this approach works best when:

  1. You have a knowledgeable friend who can help evaluate condition
  2. You purchase from a local bike shop that refurbishes used bikes
  3. You budget $50-100 for a professional inspection and tune-up after purchase

If you're uncomfortable assessing used equipment or value peace of mind, entry-level new bikes from established manufacturers offer reliable performance with warranty protection. Many shops also offer previous model year closeouts with significant discounts (20-30%) that combine new bike advantages with better value.

A properly fitting helmet is critical for safety. Follow this 5-step fit check process:

  1. Sizing: With the helmet level on your head (not tilted back), there should be a two-finger width or less between your eyebrows and the helmet rim. The helmet should feel snug but not uncomfortably tight.
  2. Side Straps: The Y-shaped side straps should meet just below your ears, forming a Y with the junction directly beneath your earlobe.
  3. Chin Strap: When buckled, the chin strap should be snug enough that you can fit only one or two fingers between the strap and your chin. You should feel the helmet pull down slightly when you open your mouth wide.
  4. Final Position: The helmet should sit level on your head (not tilted back like a cap), with the front edge one to two finger-widths above your eyebrows.
  5. Stability Test: With all straps fastened, try to move the helmet by pushing with your hands from different angles. It should move your skin slightly but not shift independently of your head more than an inch in any direction.
Important: Many helmets include multiple sizing pads of different thicknesses. Use these to fine-tune the fit. A helmet that's too loose won't provide adequate protection in a crash, while one that's too tight will cause discomfort that may discourage wearing it consistently.

Most bike shops offer free helmet fitting assistance with purchase. If you're unsure about your helmet's fit, take advantage of this service—even if you purchased the helmet elsewhere, many shops will help with basic fit adjustments.

Cyclists have several practical options for carrying personal items, each with distinct advantages:

On-Bike Storage Options
  • Saddle Bags: Attach under your seat, ideal for keys, wallet, phone, and small tools. Available in various sizes, they're secure and don't affect handling.
  • Frame Bags: Utilize the triangle space in your bike frame. Great for larger phones, snacks, and additional items while maintaining easy access.
  • Handlebar Bags: Mount to handlebars for quick-access items like phones (especially if using navigation), snacks, or cameras. Some feature clear phone-viewing windows on top.
  • Top Tube Bags: Small bags that attach to the top tube near the stem, providing easy access to essentials without stopping.
On-Body Storage Options
  • Jersey Pockets: Cycling jerseys feature 3-4 rear pockets designed specifically for carrying essentials. Secure but requires cycling-specific clothing.
  • Cycling Shorts/Bibs: Some models include small pockets for keys or cards.
  • Running/Fitness Belts: Slim waist belts designed for runners work well for cyclists carrying minimal items.
  • Phone Armbands: Secure phones to your upper arm, though access requires stopping.
  • Small Backpacks/Hydration Packs: Provide abundant storage but can cause back sweating and slightly affect handling.

For beginners, a medium-sized saddle bag offers the best combination of convenience, security, and riding comfort. They typically provide enough space for essentials (keys, wallet, phone) plus basic repair items without affecting bike handling or requiring specialized clothing.

Pro Tip: Consider minimizing what you carry by using a phone case that holds your ID and one credit card. Many cyclists create a "riding wallet" with just essential cards rather than carrying their full everyday wallet.
Clipless pedals (which ironically clip your shoes to your pedals) offer performance advantages but come with a learning curve. Consider upgrading when:

Signs You're Ready:
  • You're comfortable with basic bike handling and emergency stopping
  • You regularly ride distances over 10 miles
  • You notice foot placement issues or slipping on pedals
  • You're seeking improved pedaling efficiency
  • You're consistently riding 2-3 times weekly
Benefits of Clipless Systems:
  • Improved power transfer and pedaling efficiency
  • Consistent, optimal foot positioning
  • Better connection and control, especially on rougher terrain
  • Ability to apply power through more of the pedal stroke
  • Prevention of foot slippage in wet conditions or during intense efforts
The Learning Curve

Nearly everyone falls at least once when learning clipless pedals—usually when stopping unexpectedly. Beginners should practice clipping in and out while stationary, then in an empty parking lot or grass field before riding in traffic. Set the release tension to minimum initially, and remember that releasing requires a deliberate outward twist of the heel (not pulling up).

For an easier transition, consider these beginner-friendly options:

  • Dual-sided pedals like Shimano Click'r or SPD with adjustable tension, which are easier to engage and release than road-specific systems
  • Multi-release cleats that allow disengagement with various foot movements, not just the traditional heel twist
  • Pedals with a platform on one side and clipless mechanism on the other, providing flexibility for different rides

There's no rush to upgrade—many recreational cyclists ride happily for years on quality flat pedals with appropriate athletic shoes. The "right time" varies based on your riding style, goals, and comfort level with bike handling.

Regular maintenance extends your bike's lifespan and improves riding safety. Here's a practical breakdown of DIY versus professional maintenance:

DIY Maintenance (Beginner-Friendly)Professional Service Recommended
  • Cleaning frame and components
  • Checking tire pressure and inflating tires
  • Lubricating chain and pivot points
  • Basic flat tire repair/tube replacement
  • Minor seat and handlebar adjustments
  • Tightening loose bolts (except critical components)
  • Brake and derailleur adjustments
  • Headset and bottom bracket service
  • Wheel truing and hub maintenance
  • Hydraulic brake bleeding
  • Internal component replacement
  • Annual comprehensive tune-ups
Essential DIY Maintenance Schedule:
  • Before Each Ride: Check tire pressure, ensure brakes function properly, verify quick releases/thru-axles are secure
  • Weekly (or every 100-150 miles): Clean frame and components, lubricate chain, check for loose bolts
  • Monthly: More thorough cleaning including drivetrain, check chain wear, inspect tires for damage or wear
  • Biannually: Professional tune-up for brake/derailleur adjustments and safety check
Building Your Maintenance Skills: Many bike shops offer basic maintenance classes that teach essential skills like flat repair, cleaning, and basic adjustments. Online platforms like Park Tool's YouTube channel provide excellent step-by-step maintenance tutorials. Start with simpler tasks and gradually build your mechanical knowledge as your confidence grows.

Investing in quality maintenance supplies and basic tools (multi-tool, tire levers, floor pump with gauge) enables self-sufficiency for routine care while building a relationship with your local bike shop for more complex services.

Starting Your Cycling Journey

The right cycling gear enhances safety, comfort, and enjoyment—but remember that the most important element is simply getting out and riding regularly.

Begin with essential safety equipment and the most functional comfort improvements, then add specialized items as your experience and needs evolve. Quality entry-level gear provides most of the benefits of premium equipment at a fraction of the cost, making cycling accessible to riders at all budget levels.

As you build experience, you'll develop preferences and understand which upgrades will most benefit your specific riding style. The cycling community welcomes newcomers regardless of their equipment level—what matters most is your enthusiasm for exploring the world on two wheels.

Prev Climbing

Next Skates